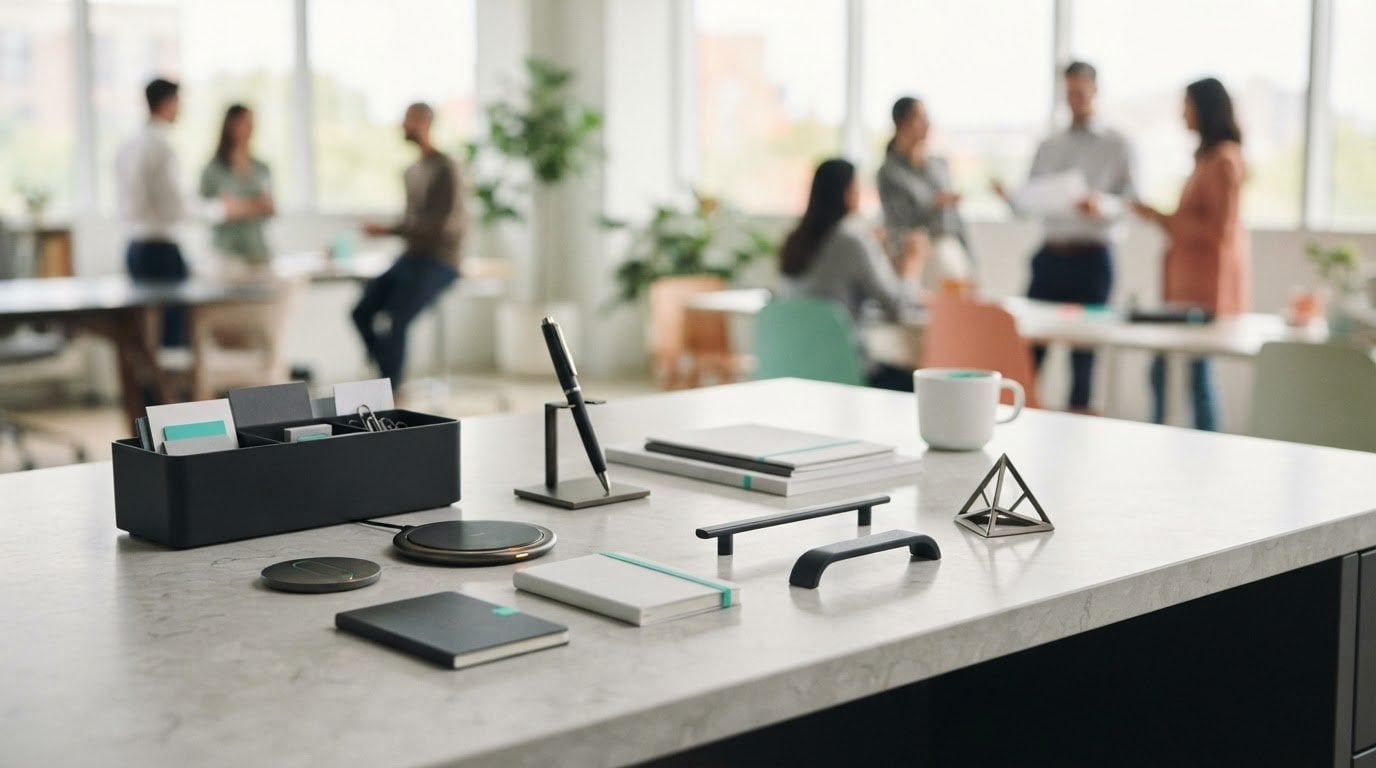

A logo alone doesn’t create a consistent tactile brand experience. Custom branded office hardware can build recognition when your identity appears on useful items people see, touch, and use throughout the workplace. Consistent colors, finishes, and design details help these objects feel like part of the same environment.
Everyday objects can shape how a workplace feels, not just how it looks. Pens, desk accessories, meeting timers, and other branded items each offer a point of contact with your brand. This article explains how physical cues support recognition, which office items can create a more unified tactile experience, and how to keep branding clear without overcrowding the design. It also covers what to consider when choosing custom pieces, from their purpose and material to where people encounter them. The aim is a workplace where useful objects reinforce a composed, recognizable identity.
Key Takeaways
- Use a restrained, consistent visual system across items so branding supports recognition without competing for attention.
- Choose useful objects people regularly see and handle, then align their materials, colors, and finishes with the workplace identity.
- Compare suppliers by how they handle design, customization, samples, and order details, not by appearance alone.
- Understand how tooling, materials, order size, and production complexity affect cost, minimum quantities, and lead times.
- For a branded timekeeping item, consider a Timeqube with your logo for meetings or mind and body therapy settings.
Brand consistency and recognition
Businesses should choose useful, frequently handled objects and align their logos, colors, and finishes. For example, matching a desk timer, cabinet hardware, and meeting materials can create a coherent tactile identity.
For a visual example of branded merchandise, watch this overview from GoCustom:
Consistent Branding Across Hardware
Custom branded office hardware can make brand cues part of ordinary workplace routines. A person handling a desk timer, opening a cabinet, or using a branded pen encounters the identity through touch as well as sight. Repeating a restrained logo, consistent colors, and related finishes helps these separate objects feel connected. The goal is recognition, not placing a mark on every available surface.
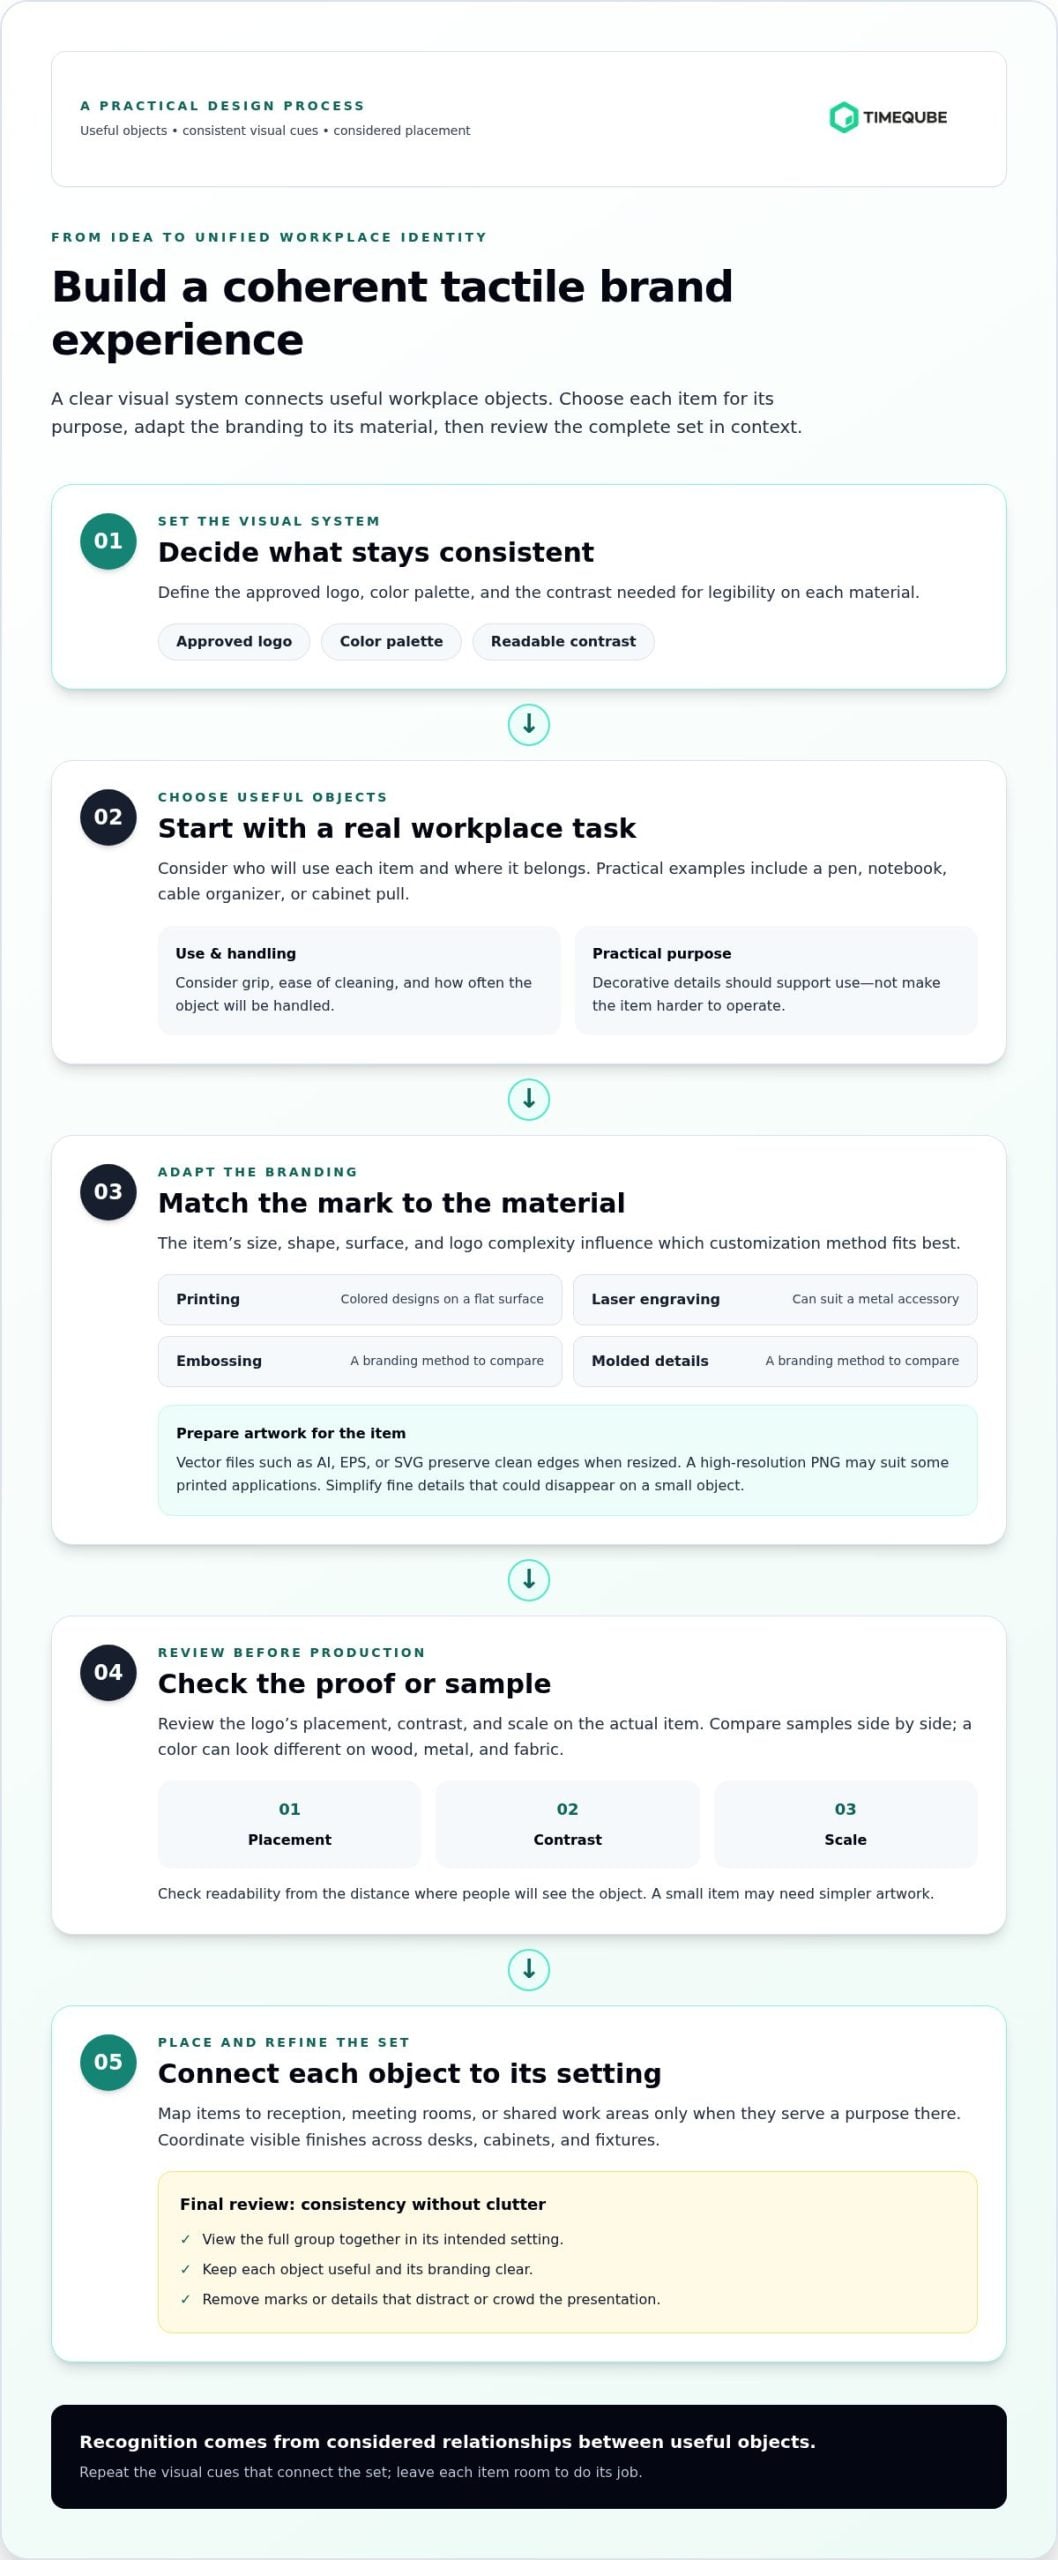
Build a simple visual system before selecting individual items. Define the approved logo, color palette, and contrast needed for legibility on each material. A dark logo may read clearly on a light desk accessory, while an engraved mark may suit a metal cabinet pull. Compare samples side by side, since the same color can look different on wood, metal, and fabric.
Choosing Branded Office Hardware
Start with the people who will use each item and the task it supports. A meeting room may benefit from a visible timer, while shared storage may call for durable cabinet handles. Consider grip, ease of cleaning, and how often each object will be handled. Decorative details should support use, not make a practical item harder to operate.
Then assess the branding against the item’s size and material. A personalized mark on a small object may need simpler artwork than a logo on a desk mat. Check contrast from the distance where people will see the item, and consider whether a subtle mark suits a premium reception area better than a large graphic. Keep the design consistent without making every object identical.
- Match the item to a real workplace task, such as timing meetings or organizing supplies.
- Choose finishes that coordinate across visible surfaces, including desks, cabinets, and fixtures.
- Use clear contrast so the mark remains legible against the item’s material and color.
- Limit decorative elements when they compete with the logo or make an object less useful.
Map where each item will appear. Place branded accessories in reception, meeting rooms, or shared work areas only when they serve a purpose there. This ties recognition to useful experiences rather than visual repetition. Review the full set before ordering, checking that each object connects to the same workplace identity.
Reviewing the full set together also helps reveal when branding becomes excessive. Avoid overcrowding display boards with logos. A crowded display can make intended brand cues harder to distinguish, so give each mark enough room to remain clear and recognizable. Apply the same restraint across workplace objects: consistency comes from a considered relationship among items, not from repeating a logo everywhere.
Before finalizing a group of items, view them together in their intended settings. Check that each object has a practical role and its branding contributes to a coherent impression. Remove marks or decorative details that distract from the item’s use or make the presentation feel crowded. This connects recognition to useful, well-considered design.
Custom branded office items and examples
A branded object works best when its design suits its purpose and setting. Compare practical examples, customization choices, and ordering steps before selecting items.
Office Hardware Items and Examples
A desk timer, pen, notebook, cable organizer, or cabinet pull can carry a workplace identity. Choose each item for a real task, then match its size and design to where people will use it. A meeting-room timer serves a different purpose from decorative cabinet hardware in reception. Both can contribute to a coordinated experience without identical logos or finishes.
Suppliers differ in the materials, customization methods, and order options they provide. Compare samples, production details, and total order terms rather than judging quality by a product image alone. A low-quality finish can wear quickly, while a flimsy item may undermine the impression its branding is meant to create.
U.S. safety considerations depend on an item’s function and materials. A pen, cabinet pull, and powered desk device have different uses, so assess each product against requirements relevant to its category. Poor-quality hardware can also create practical problems: a logo may fade, or a weak component may stop serving its intended purpose.
Customization and Logo Artwork
Common branding methods include printing, laser engraving, embossing, and molded details. The right method depends on the material, logo complexity, and available surface. Engraving can suit a metal accessory, while printing can reproduce colored designs on a flat surface. Request a digital proof or sample to review placement, contrast, and scale before production.
Artwork requirements vary by supplier and item. Vector files such as AI, EPS, or SVG preserve clean edges when a logo is resized; a high-resolution PNG may suit some printed applications. Provide the original logo, color references, and placement notes. Include clear-space guidance if the mark needs room around it, and simplify fine details that could disappear on a small item.
Adding a logo is only one decision. Color, surface texture, and an item’s shape also influence how it feels in use. Review each option against the workplace’s visual identity, then choose a finish that remains legible and suits the object.
Ordering Branded Office Hardware
Start by listing the item, intended users, quantity, and workplace location. Prepare the logo artwork and explain the desired placement, colors, and finish. A photo, image, detailed description, or drawing can help communicate a custom hardware project. These references clarify the design before production.
Review the proof for spelling, logo proportions, contrast, and placement. Confirm that the pictured material and finish match the intended item, then approve the order details. A logo that reads clearly on a full-size desk accessory may need adjustment on a narrow cable organizer. Careful review helps prevent avoidable artwork errors.
- Define the item’s workplace purpose and intended users.
- Prepare logo artwork and specific placement instructions.
- Review a proof or sample for scale, finish, and readability.
- Approve the final design and order details before production.
What are the best suppliers of custom branded office hardware in the United States?
The right supplier depends on the item, customization method, order size, and intended use. Compare product fit, sample quality, artwork handling, and clear order terms before choosing.
Group suppliers into three practical categories: promotional merchandise specialists, custom hardware manufacturers, and office product suppliers with branding options. A merchandise specialist may suit notebooks or desk accessories. A hardware manufacturer may better fit a custom cabinet pull. An office product supplier may simplify orders that combine several everyday items.
Match the supplier’s production approach to the object. Printing can suit a flat desk accessory, while engraving may work better on metal. Ask how artwork is prepared and how logo placement is handled on the specific material. For custom branded office hardware, the production method should suit both the item’s surface and the logo design.
Physical samples make quality easier to assess than product photos alone. Request one before placing a large order, especially when finish, texture, or logo legibility matters. Inspect the item under ordinary office lighting. Check whether a small logo remains readable on a dark surface and whether a desk accessory feels stable during use.
For online orders, review the seller’s customer service, return policy, and customer reviews. These details clarify how the supplier handles design errors, damaged goods, or order questions. Read the terms for artwork approval and returns before committing. Clear procedures matter when a customized item can’t simply be replaced with an unbranded alternative.
Use a consistent comparison process. Send each supplier the same item description, logo artwork, finish preference, and quantity. Compare samples, production explanations, and written order details side by side. This reveals differences more clearly than comparing a polished product image with an incomplete quote.
- Product fit: Confirm the supplier works with the item and material you need.
- Customization: Compare printing, engraving, or other methods against the design.
- Quality: Review a physical sample for finish, function, and logo clarity.
- Order process: Read customer reviews, return policies, and customer service terms.
- Communication: Look for clear artwork proofs and written specifications.
Judge the overall experience rather than choosing by the lowest quote alone. A supplier’s sample, production clarity, and order process all affect the finished result. For custom branded office hardware across several item types, compare how each supplier adapts its method to different materials. Focus on your actual use case, such as outfitting meeting rooms or preparing employee welcome kits.
How much does custom branded office hardware cost?
Cost depends on the item, material, customization method, and production volume. For custom hardware, tooling can be a major upfront expense. That figure describes the mold, not the finished order. Branding, materials, manufacturing, and quantity also shape the total project cost.
Separate tooling from the finished order
Tooling creates the form used to manufacture a custom part. These examples show why the item’s shape and production method matter when comparing estimates.
For smaller production runs, custom tooling can account for 50-70% of the initial project expense. A custom branded office hardware project with a small run may therefore carry substantial setup costs. Custom tooling is generally considered financially viable for production runs exceeding 500 units. For smaller orders, choosing an existing product and adding a logo may avoid the need for a new mold.
Compare estimates on the same basis
Ask each supplier to separate setup, tooling, product, branding, and shipping costs. Keep the specification consistent: request estimates for the same cabinet handle material, finish, logo placement, and quantity. If one estimate includes a new mold and another uses an existing shape, the totals don’t represent equivalent work. A line-by-line comparison shows what each estimate covers.
Identify the production method behind the branding. Engraving, printing, and molded details require different preparation and may work differently with metal, plastic, or wood. A custom shape can require tooling, while adding a mark to an existing item may not. A sample or proof helps assess the proposed finish and logo placement before production approval.
Plan around order volume and purpose
Start with the intended use and expected quantity. A small employee welcome order may favor existing products that can be personalized without custom tooling. A larger, repeat production run may make a new mold more practical, especially when the exact shape supports a distinct brand identity. Use the 500-unit reference as a planning consideration, not an automatic threshold.
When evaluating custom branded office hardware, confirm that each estimate describes the same finished item. Check the quantity, material, finish, logo method, tooling, and delivery terms in writing. An estimate for an unbranded handle cannot be compared directly with one that includes custom artwork and a new mold. This makes estimates clearer and supports a grounded purchasing decision.
What are typical minimum order quantities and lead times?
Minimum quantities and production timing depend on the item, customization method, and whether tooling is required. Adding a logo to an existing desk accessory follows a different process from making a newly molded cabinet component. Identify these production choices early to plan a realistic purchasing schedule.
What determines the minimum order quantity?
Suppliers set minimums according to setup effort, production method, materials, and efficiency. Printing a logo on an existing product may involve different setup needs from making a custom-shaped part. A new mold adds tooling work and can make small runs less economical. Ask how the requested quantity relates to the item and its manufacturing process.
Separate a supplier’s minimum from your ideal quantity. A team may need branded desk accessories for one meeting room, while production works better with a larger batch. Consider whether remaining items could support future hires, another office, or later events. This makes the minimum an inventory decision, not just a purchasing hurdle. For custom branded office hardware, expected reuse can help determine a sensible order size.
What affects lead time?
Production typically involves artwork preparation, proof approval, material sourcing, manufacturing, branding, and shipping. Changing the logo or finish after proof approval can add another review and production step. A custom mold also requires work before the main production run. Ask for a schedule that distinguishes design approval, production, and delivery.
An existing product with approved artwork may pass through fewer stages than a custom cabinet handle requiring a new mold. Material selection can also affect the sequence if the chosen finish needs extra preparation. Plan backward from the date the items must be in use, allowing time for internal design approval and shipping. This is especially useful for coordinated branded hardware orders.
How to plan an order
Prepare a clear request before seeking production details. Include the item, material, finish, logo artwork, quantity, delivery location, and required in-hand date. Ask suppliers to state their minimum order and explain schedule milestones. These details make estimates easier to compare, even when suppliers use different production methods.
- Choose an existing item or define the custom shape.
- Submit final artwork and approve the proof promptly.
- Confirm quantity, materials, finish, and delivery date in writing.
- Schedule internal review before production begins.
A written timeline should identify when artwork approval is due and when production starts. It should also clarify whether shipping is included in the schedule. If the project includes separate items, such as desk accessories and cabinet hardware, track each production path independently. This helps reveal which item could delay the full workplace rollout.
For a branded visual timer used in meetings, explore logo-customized timer options as part of your workplace planning.
Timeqube: Timeqube for Mind/Body Therapies
Timeqube offers Timeqube for Mind/Body Therapies, a physical visual timer for sessions that benefit from calm, visible time cues. Its color-coded light signals support time awareness without adding another digital screen to the space.
For workplaces, Timeqube for Business Meetings brings the same visual approach to meeting rooms. Businesses looking for a branded, practical meeting tool can choose Timequbes with Your Logo to connect timekeeping with their visual identity.
This kind of branded wellness tool is most relevant when people need a gentle time cue during therapy or group meetings. It isn’t a substitute for every branded office item, such as cabinet hardware or desk accessories. It offers a focused option for teams that want timekeeping to feel more present and less screen-led.
Explore Timeqube online or contact Timeqube to learn more.
Choose a Branded Detail That Fits Your Workplace
Choose a branded object with a clear role in your workplace. Rather than adding marks to every surface, select a useful item that naturally belongs in a meeting or therapy setting. This keeps custom branded office hardware connected to real routines and gives the design a practical purpose.
Timeqube offers Timeqube for Mind/Body Therapies, Timeqube for Business Meetings, and Timequbes with Your Logo. These options bring visual timekeeping into settings where a calm, visible cue can support the experience. Consider which setting matters most, then choose an item that fits its use and your workplace identity.
A deliberate choice can make branded design feel like part of the environment, not an interruption. Contact Timeqube about branded hardware to explore an option for your workplace.
Frequently Asked Questions
Hardware: How Does It Impact the Tactile Brand Experience?
Hardware makes a brand perceptible through repeated physical interactions, not just visual exposure. A smooth desk accessory, a firm cabinet handle, or a timer’s visible color cue can shape how a workplace feels to use. A meeting room designed for focused discussion, for example, benefits from objects that feel calm and intuitive. Consistent sensory choices connect a space’s function with its identity.
Which office hardware products can be customized with a company logo?
Office products that can carry a logo include desk accessories, pens, notebooks, cabinet hardware, and physical timers. Choose based on where the item will be used and whether the logo stays clear at that scale. For meeting rooms, Timequbes with Your Logo offer a branded visual timer. For therapy settings, Timeqube for Mind/Body Therapies provides a purpose-built timing option.